April 11, 2021
How to create strong passwords and improve your cyber hygiene
How to Install OPNsense 26.7 and Harden with CIS Security Baselines
OPNsense is an open source, FreeBSD-based firewall and routing platform developed by the Dutch company Deciso. Launched in 2015 as a fork of pfSense and m0n0wall, it is designed to provide cutting-edge network protection with a user-friendly web interface, comparable to expensive commercial security products but with verifiable open-source code.
In this journal, I walk through the installation process for OPNsense 26.7. After completing the installation, I’ll be applying hardening recommendations based on the Center for Internet Security (CIS) Baseline. This install instance is part of a larger lab that I’m working, which I’ll share aspects of in later posts.
Installing OPNsense
Download and extract the ISO image
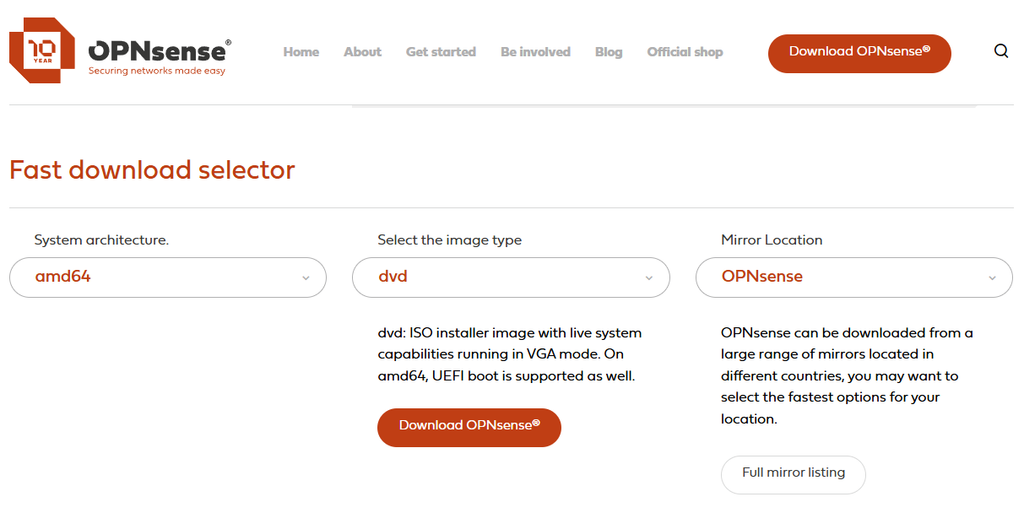
To get started, we first need to head over to the OPNsense download page and grab the ISO installation image. For this installation, we’ll use the DVD ISO image. Change the Select the image type dropdown from VGA to DVD, then click the Download OPNsense button.
The downloaded file is a compressed archive, so use your preferred method and extract the OPNsense-<version-number>-dvd-amd64.iso file to the desired location.
Create the Virtual Machine
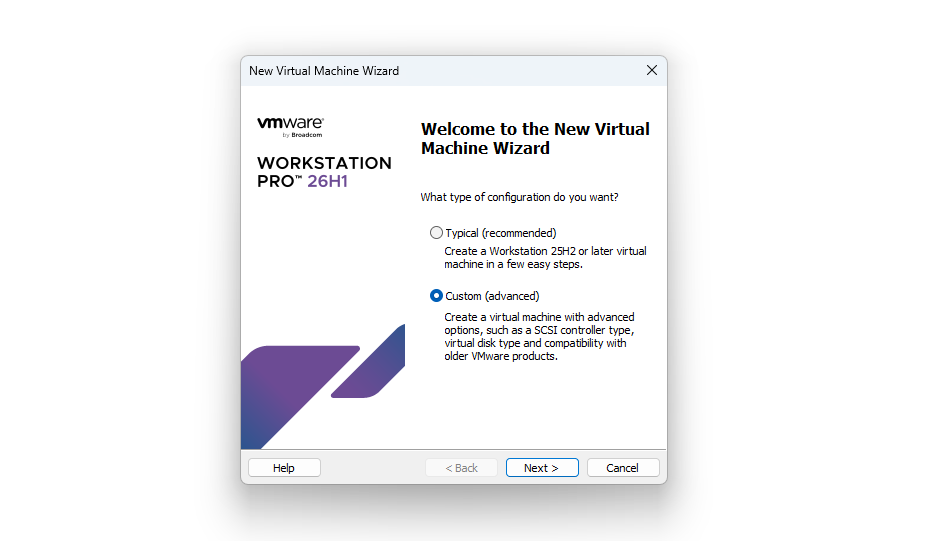
For this lab, I’ll be using VMware Workstation PRO 26H1. You can download a free copy from the Broadcom portal using the instructions on the release page. Navigate to File → New Virtual Machine. This will launch the New Virtual Machine Wizard. Choose the Custom (advanced) configuration option and click Next.
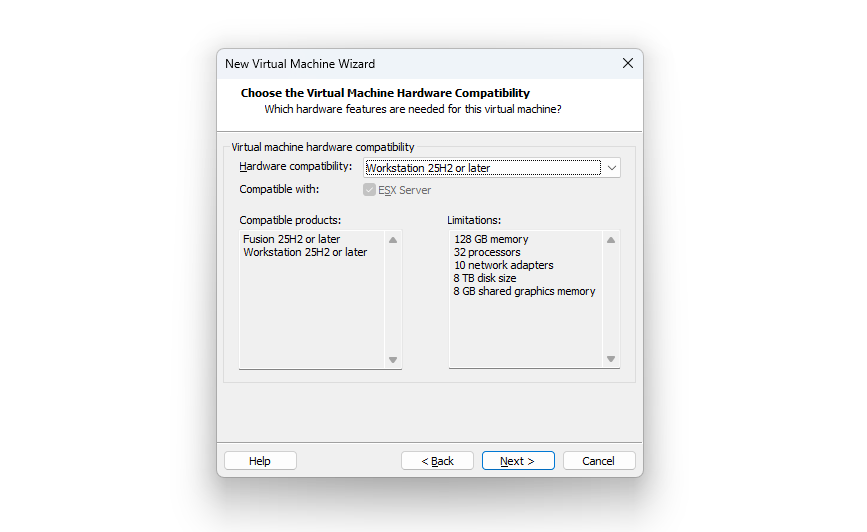
On that Virtual Machine Hardware Compatibility screen, choose Workstation 25H2 or later. Click Next to continue.
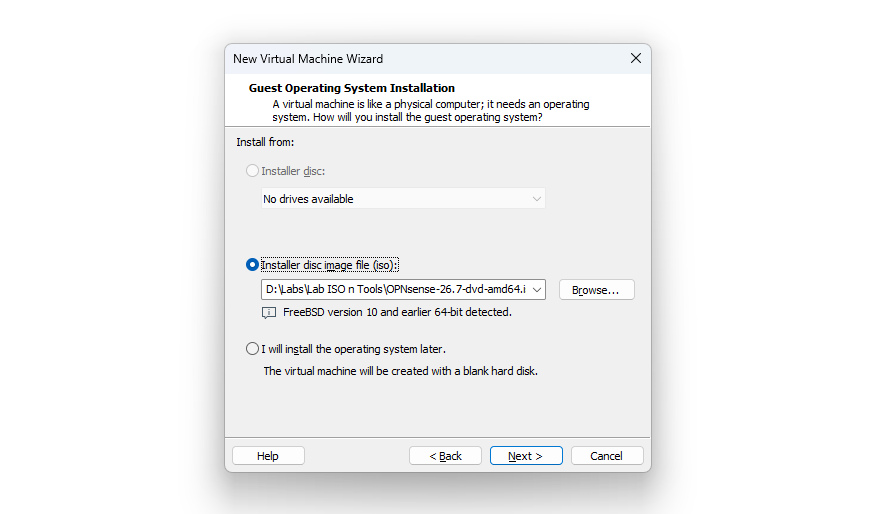
Choose Installer disc image file (iso) on the Guest Operating System Installation screen, and browse to where you extracted the OPNsense ISO image file. Select the ISO file, choose Open, then Next to continue.
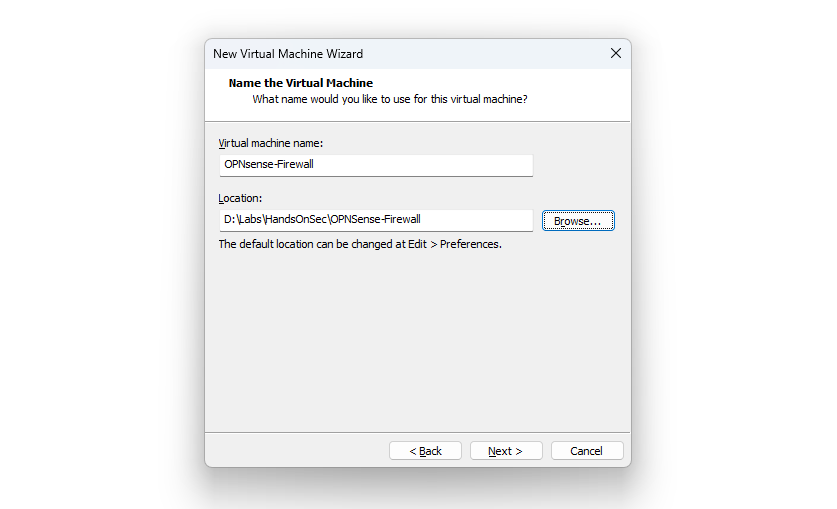
On the next screen, name the virtual machine and browse to a location where the virtual machine files will be stored. Be sure to create a folder for each VM to avoid conflicts.
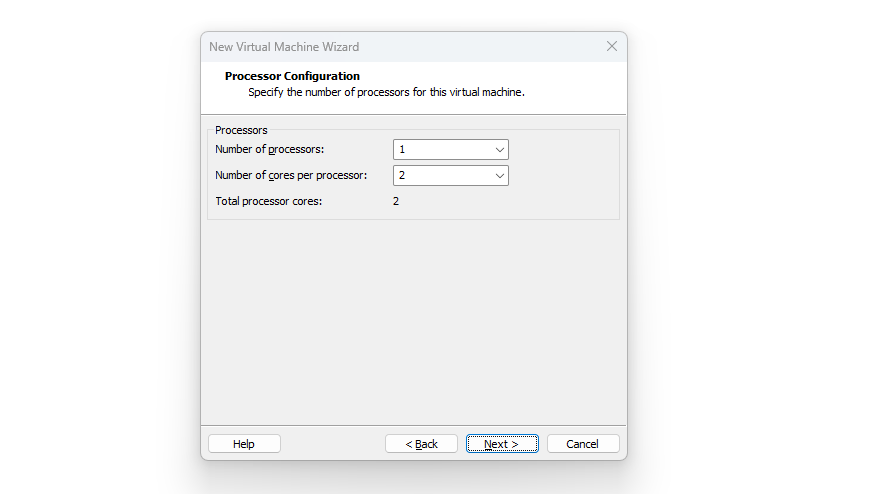
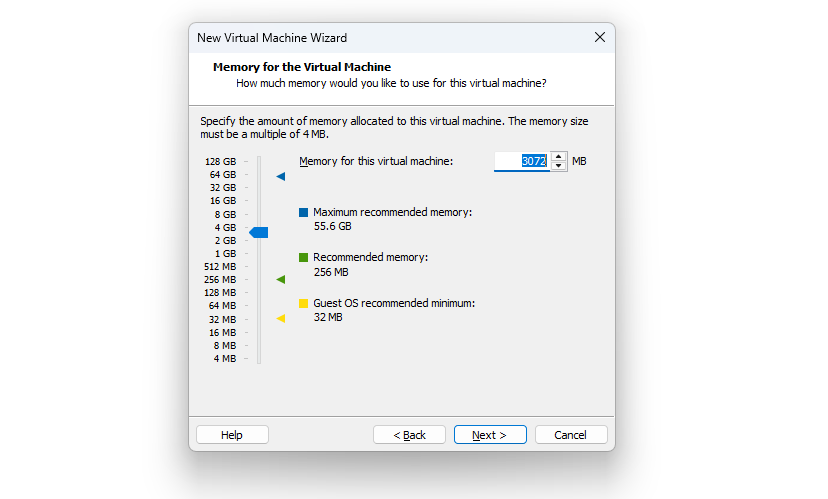
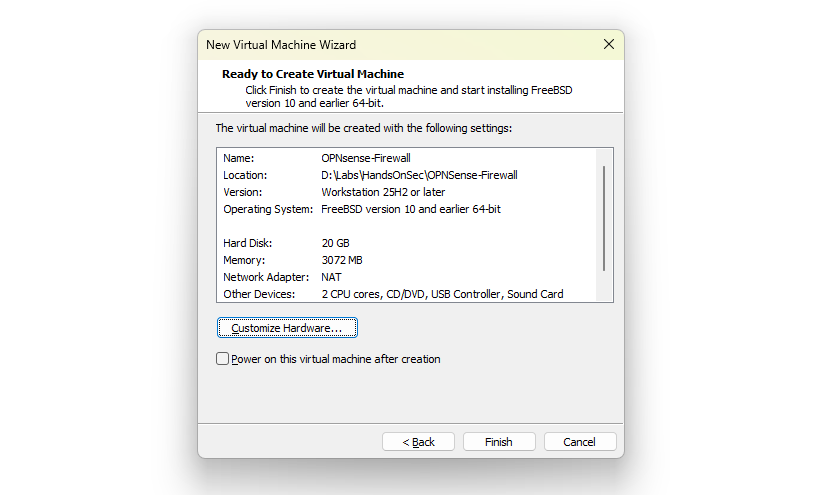
The following two screens allow you to specify the processor and memory configuration. For my current use case, I’ll go with 1 processor with 2 cores and 3GB of RAM. While OPNsense is lightweight and I’d only need 1GB of RAM to run adequately for my use case, the installer will issue a warning before attempting to clone the live environment image to the virtual hard drive if RAM is less than 3GB. After the installation, the RAM will be decreased to 1GB.
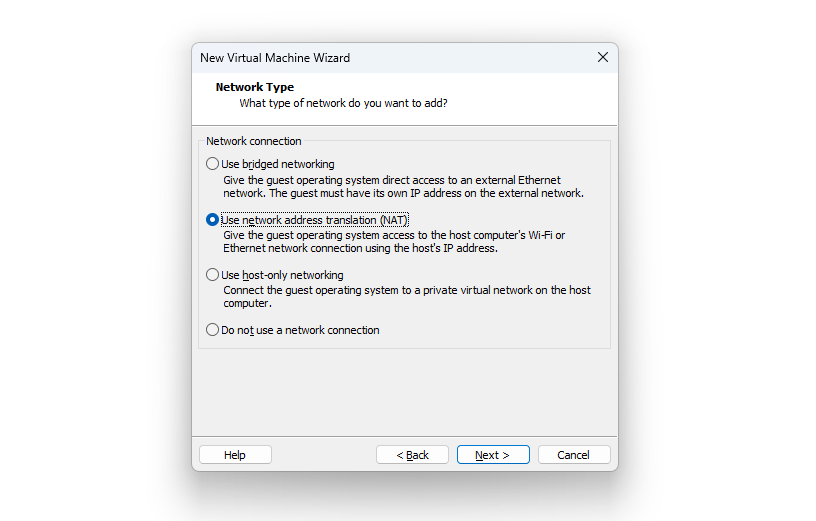
For the network type, we’ll choose Use network address translation (NAT) for the main network interface, which will act as the WAN port.
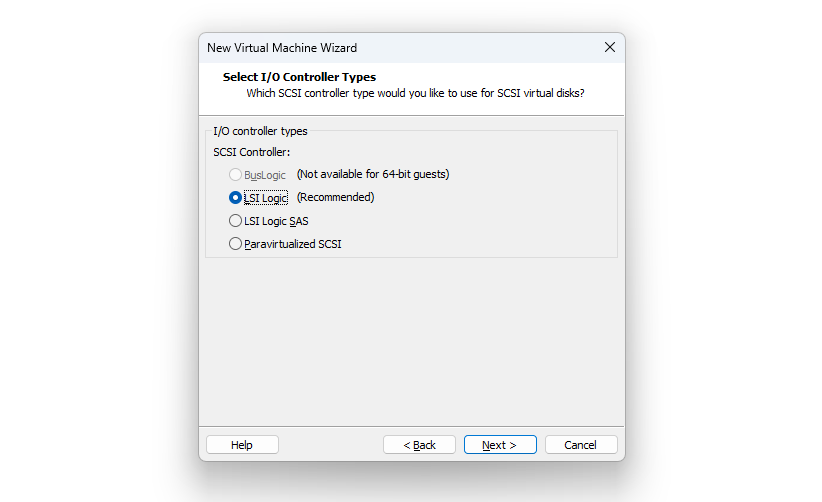
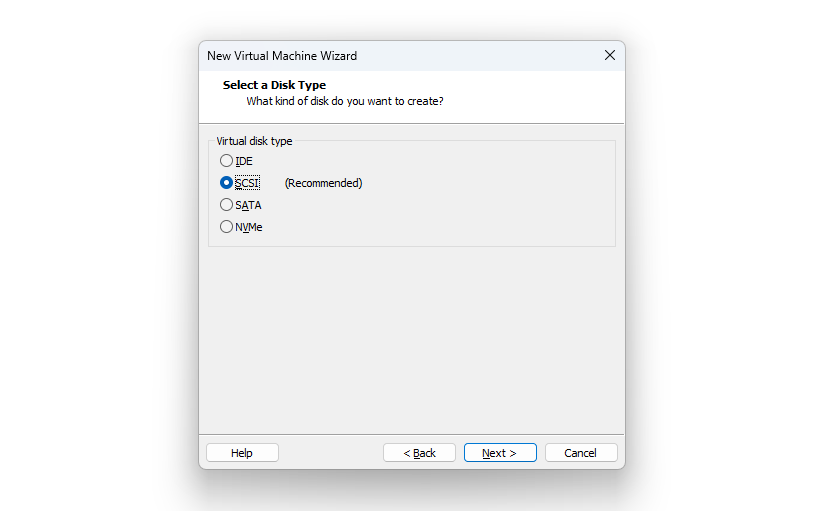
Choose the defaults on the I/O Controller Types (LSI Logic) and Disk Type (SCSI) screens.
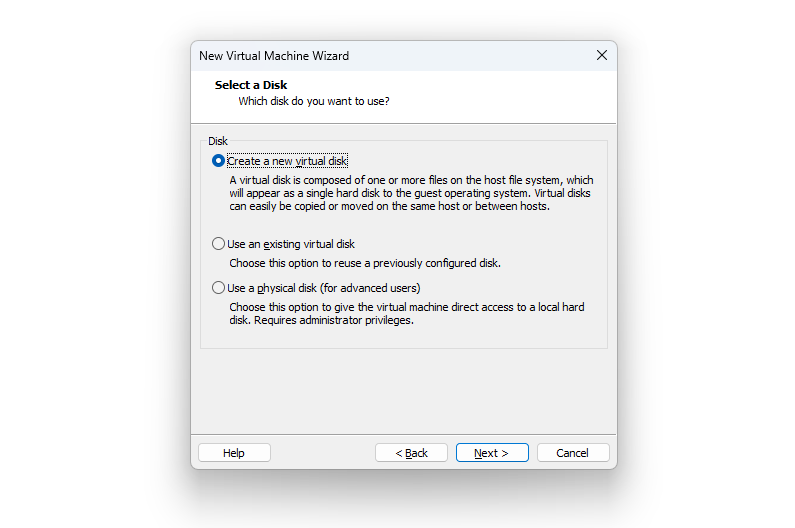
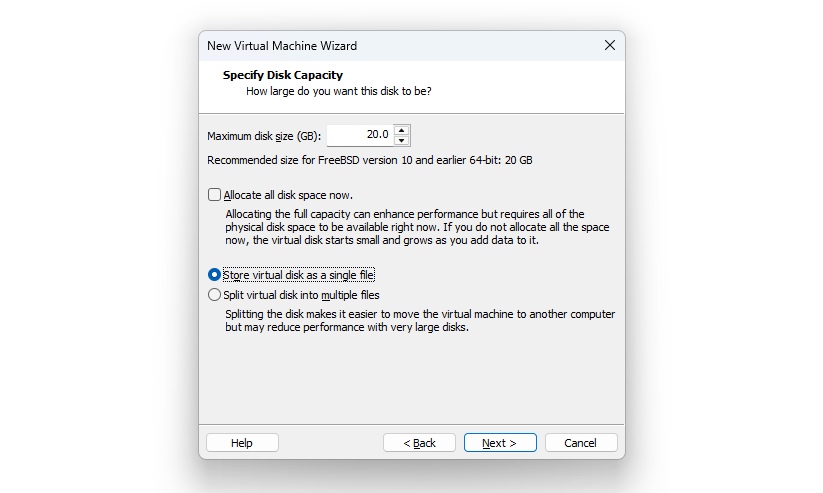
Create a new virtual disk for this virtual machine with the default capacity of 20GB. Choose the Store virtual disk as a single file option for better snapshot management.
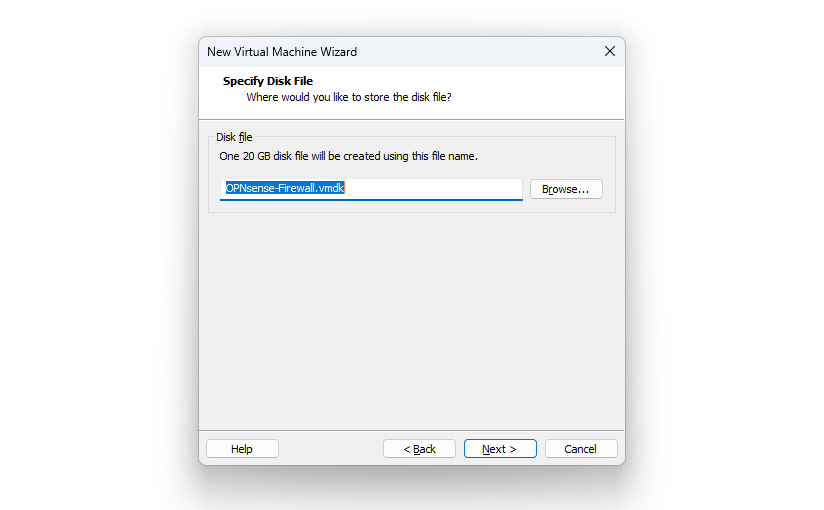
Specify the name of the virtual disk file or accept the default name given. The disk file will be stored in the location chosen earlier. Next to continue.
We’ve now come to the last page of the new VM wizard. Before we hit the Finish button, let’s configure additional network cards for this VM. For this use case, OPNsense will be managing traffic for two internal subnets. Thus, we need to configure two additional network cards for this VM. Choose the Customize Hardware button.
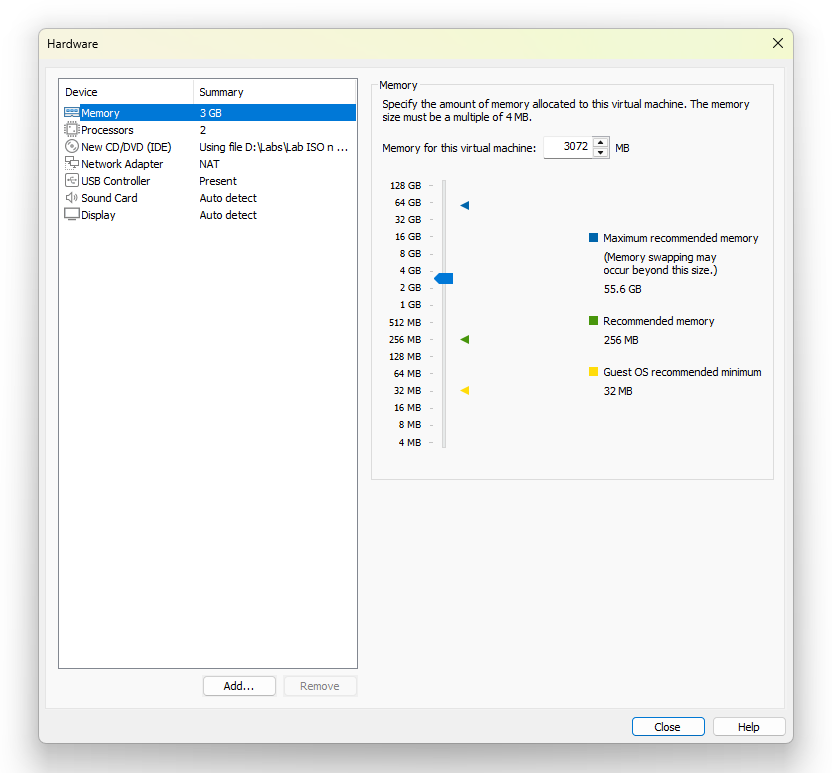
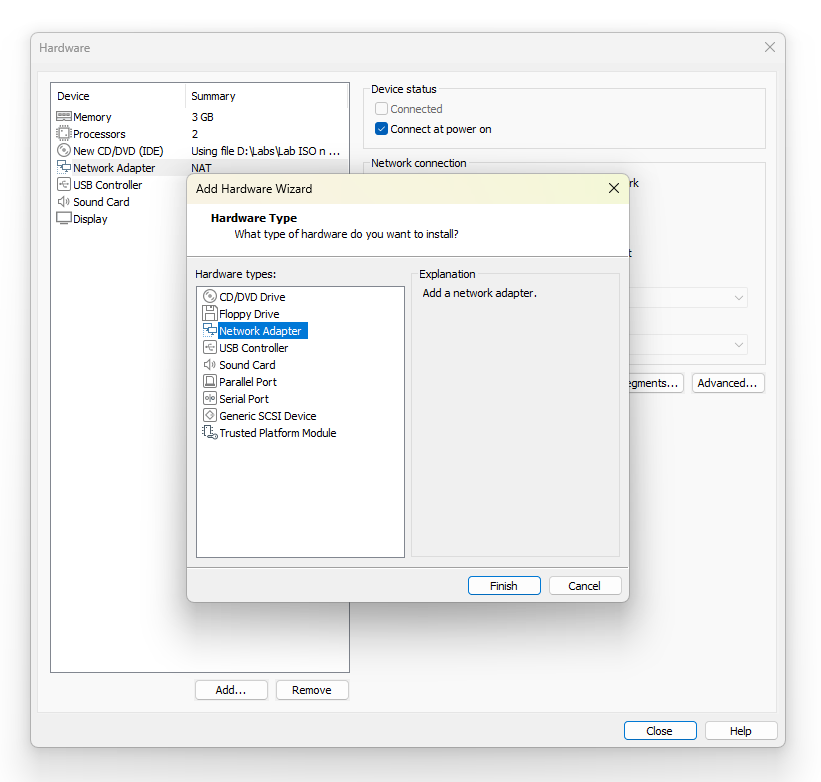
Click Add… to open the Add Hardware Wizard. Choose Network Adapter and Finish. Do this again to add the third network adapter.
Select Network Adapter 2 and click the LAN Segment… button. Click Add and create two LAN segments. These will represent the two logical subnets in this lab. Click OK when done.
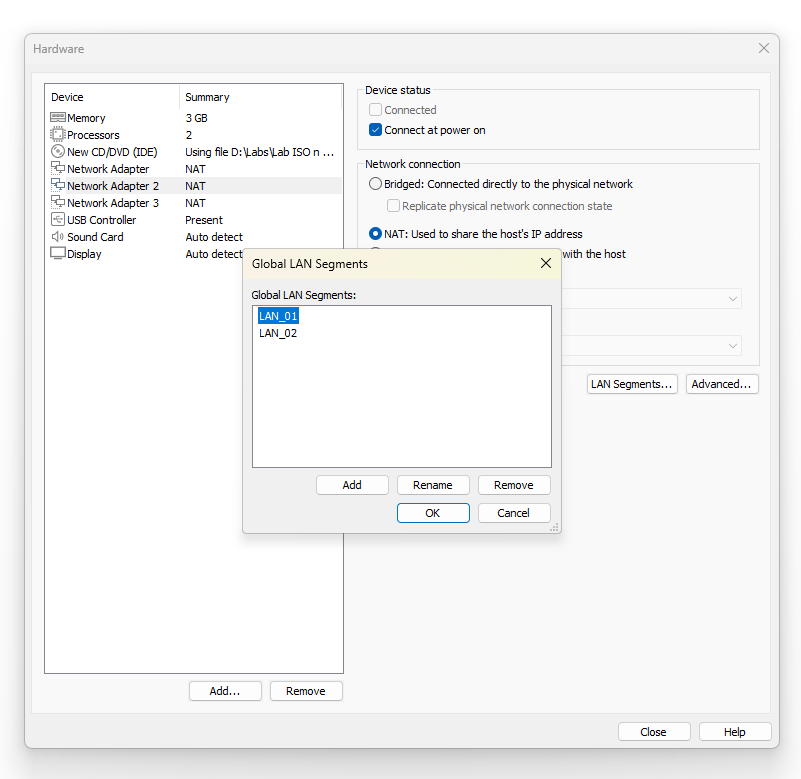
Now change the Network connection from NAT to LAN segment and choose LAN_01. Select Network Adapter 3 and perform the same actions to assign the LAN_02 segment to this adapter.
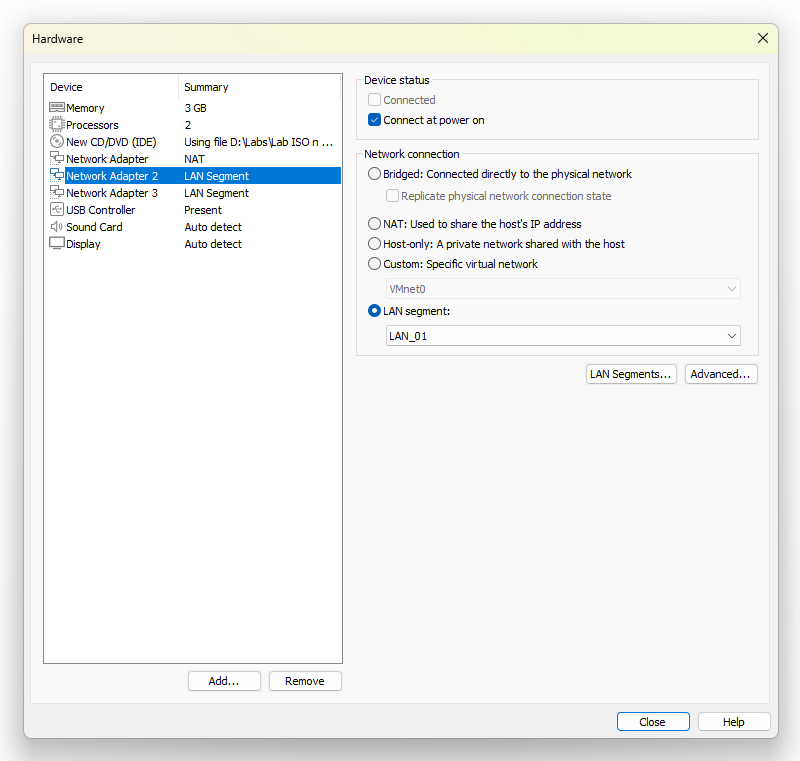
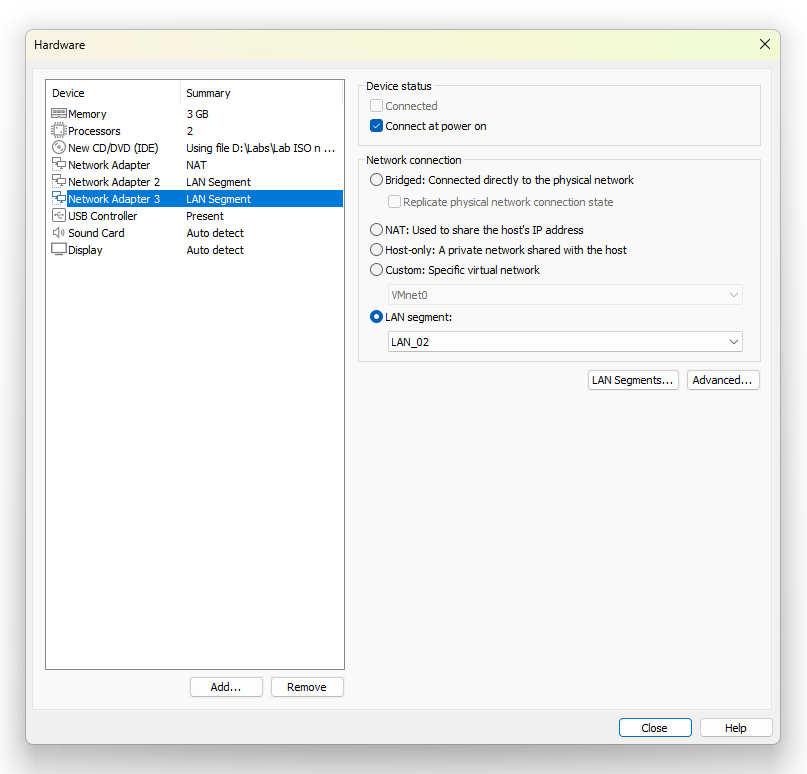
The USB Controller won’t be needed in this instance, so we’ll select it and choose Remove. Close to return to the wizard.
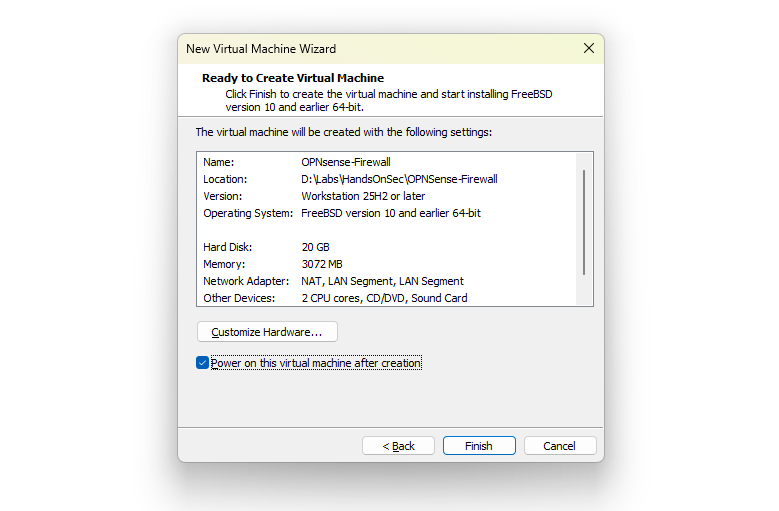
Select the checkbox next to Power on this virtual machine after creation and choose Finish.
Launch the OPNsense Installer
The virtual machine powers on and boots from the mounted ISO into the live environment.
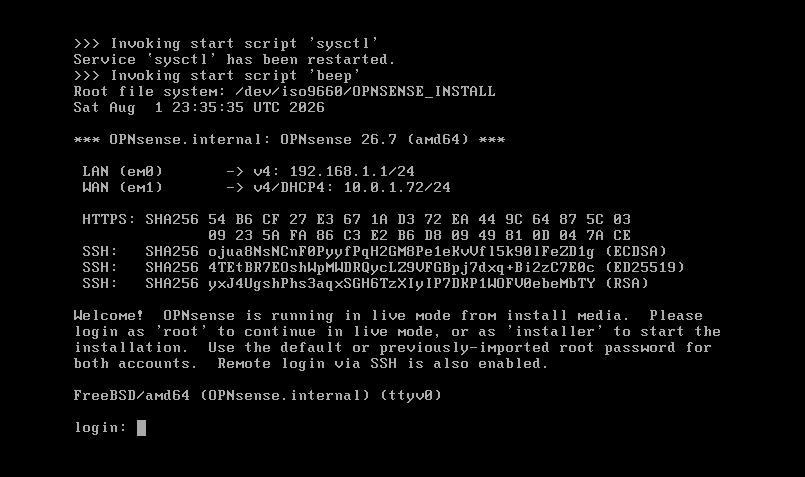
Launch the OPNsense installer by logging in with the default installer account.
Username: installer
Password: opnsense
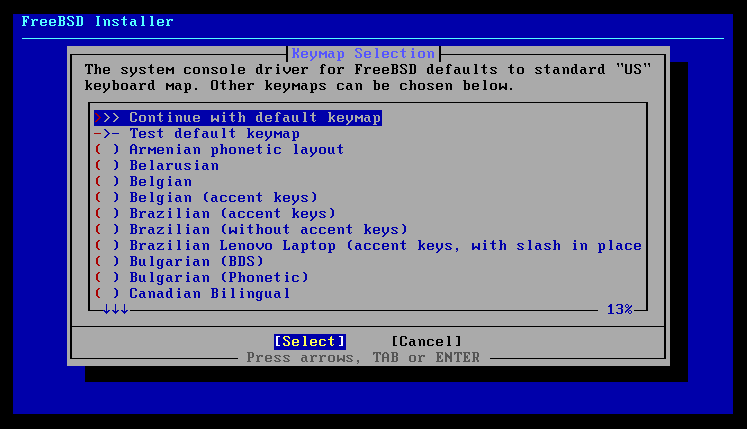
Press Enter to select the default US keyboard map. If you desire another language, use the arrow key and space bar to choose the preferred keyboard layout then press Enter.
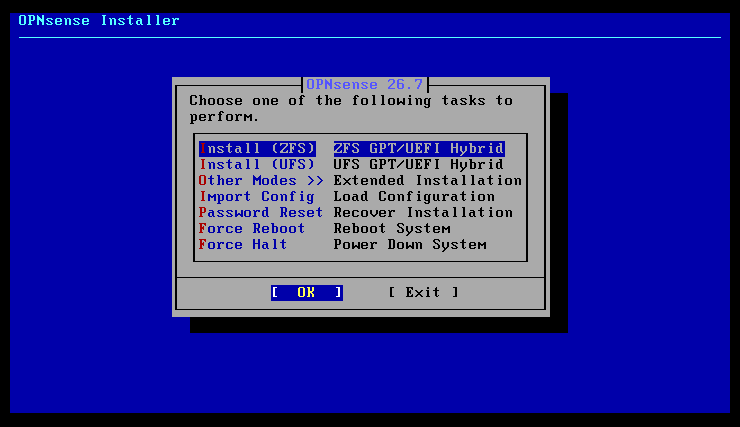
Press Enter to select Install (ZFS)
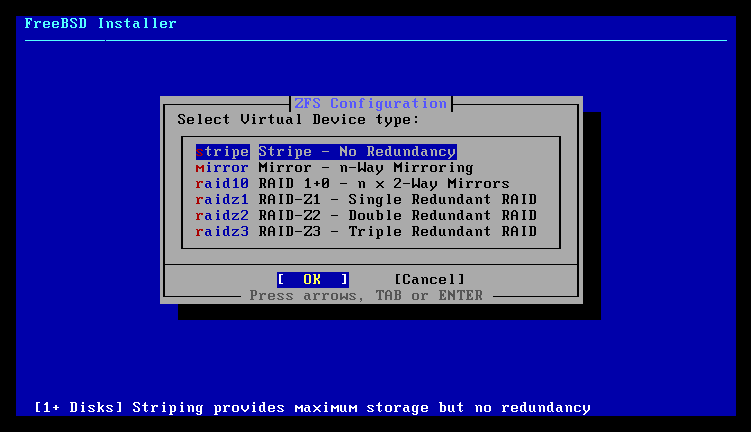
Press Enter to choose Stripe – No Redundancy. This VM was only configured with one hard drive, so no redundancy configurations are possible.
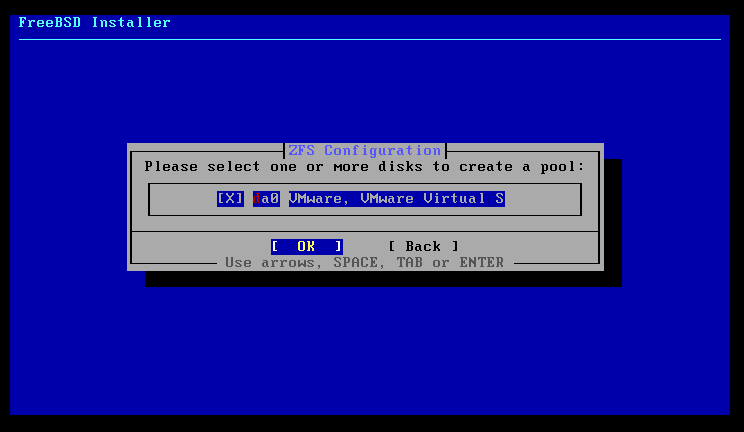
Press the Space Bar to select the detected hard drive, then press Enter to continue.
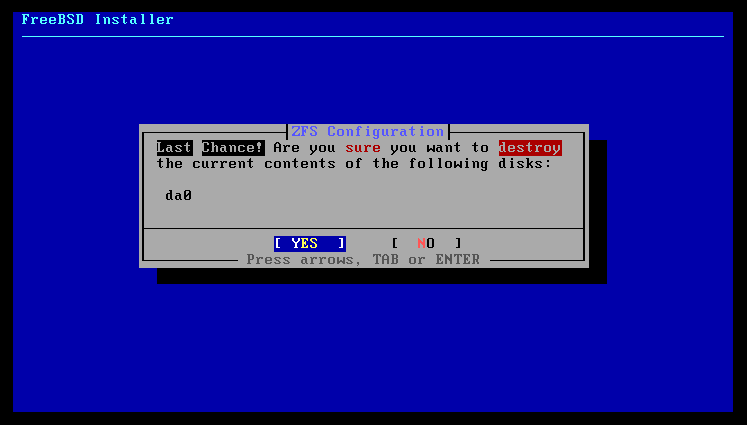
Use the arrow key to select YES to confirm erasure of the hard drive and start the installation.
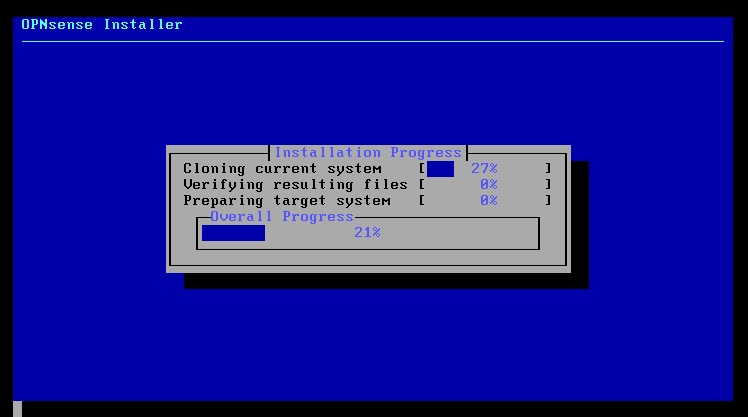
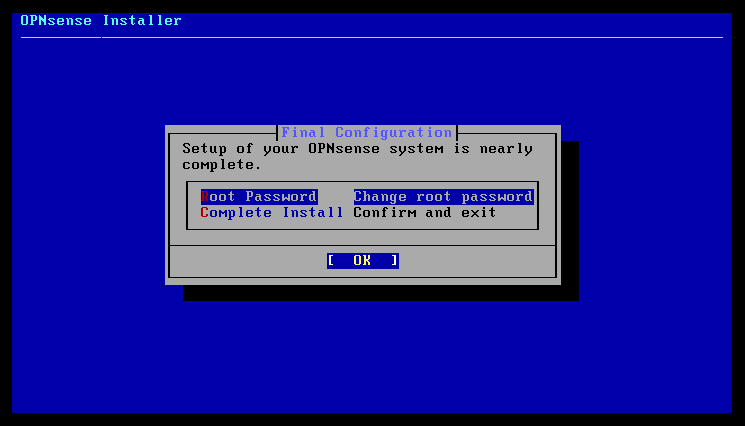
The installation is now complete! The final step is to change the default password for the root account from opnsense to a more secure password of your choosing. Press Enter, type and confirm the new secure password for the root account. Select Complete Install and press Enter.
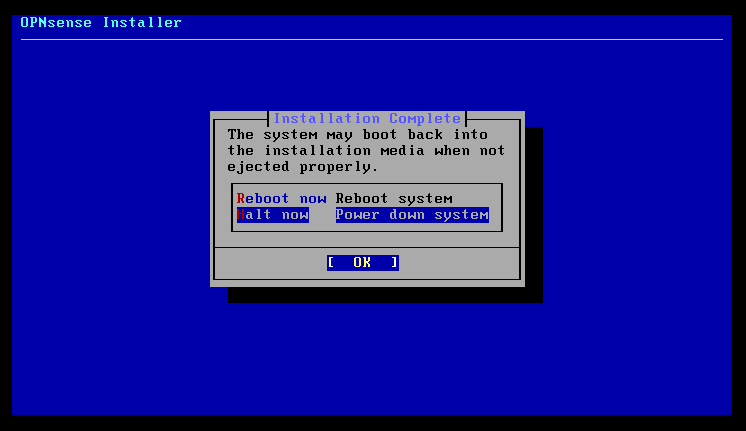
Select Halt Now and press Enter to power off the VM.
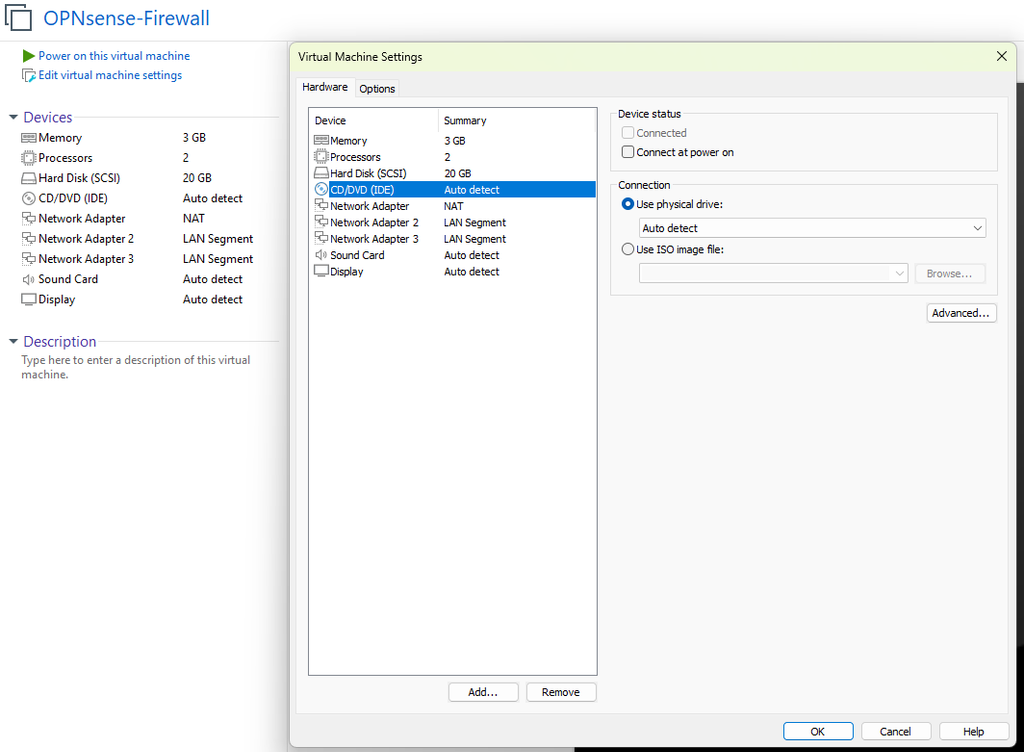
To avoid booting into the OPNsense live environment when the VM starts up, let’s unmount the ISO image. Choose Edit virtual machine settings, click on CD/DVD (IDE), uncheck Connect at power on under Device status and choose Use physical drive: under the Connection section.
Power on the VM and log in with the root account
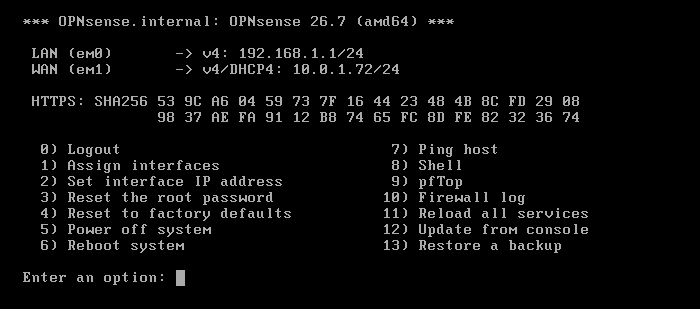
Configure Network Interfaces
Now let’s assign OPNsense WAN, LAN and OPT1 interfaces to the network adapters. Press 1 and Enter to choose the Assign interfaces option.
Press Enter to accept the default option of No, for the LAGGs and VLAN configuration questions.
Assign the WAN interface to em0, the LAN interface to em1, and the Optional (OPT1) interface to em2. Press Enter to perform no assignment for OPT2.
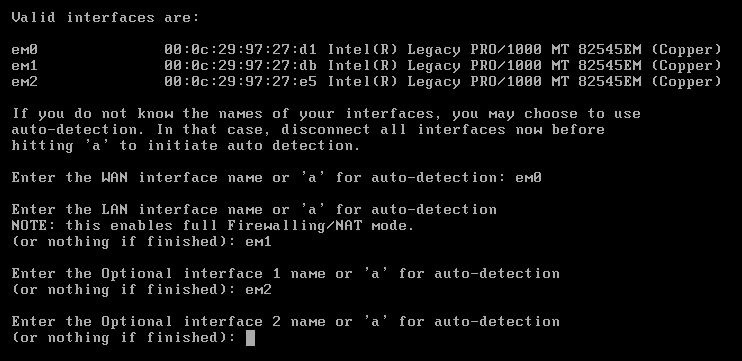
Type y and press Enter to confirm the interface assignments

Press 2 and Enter to choose the Set interface IP address option. Press 1 and Enter to configure the LAN interface.
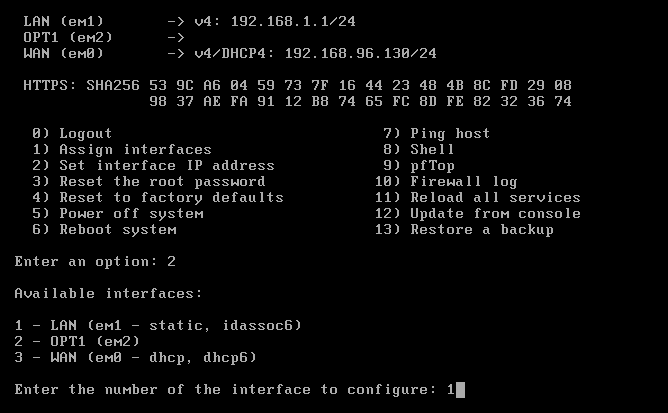
Press Enter to accept the default No response to configuring the LAN interface via DHCP.
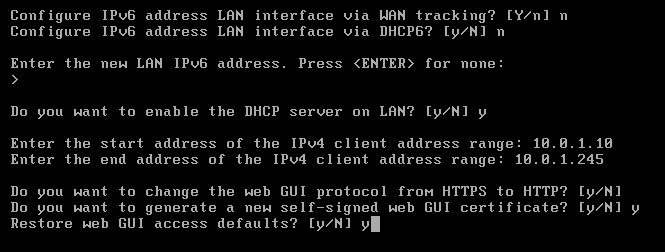
Enter 10.0.1.1 as the new IP address for the LAN interface and enter 24 as the subnet mask. Press Enter at the gateway prompt, and enter n and press Enter to the IPv6 config options. Press Enter to continue without assigning a static IPv6 address.
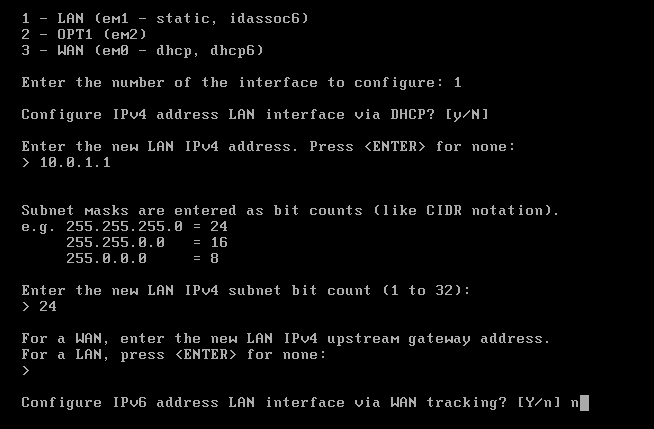
Type y and Enter to enable DHCP on the LAN interface. Enter 10.0.1.10 as the start address and 10.0.1.245 as the end address of the DHCP lease range.
Press Enter to not change GUI protocol from HTTPS to HTTP. Type y and Enter to generate a new self-signed web GUI certificate. Press y and Enter to restore GUI access defaults.
Repeat the same process to configure the IP address and DHCP settings for the OPT1 interface. Set the interface address to 10.0.2.1/24 and the DHCP range to 10.0.2.10 - 10.0.2.245.
CIS Security Baseline for OPNsense
The Center for Internet Security (CIS) publishes benchmarks that focus on technical configuration settings for various systems and technologies. The recommendations are applied to establish secure configuration baselines to help maintain essential cyber hygiene.
The CIS Benchmark for OPNsense has 29 recommendations in 6 groups: General Settings, User Management, Password Policy, Firewall Policy, Service Configuration and Logging. Only 12 recommendations will be implemented upon initial installation of OPNsense. The remaining recommendations will be implemented as the need arises.
| Benchmark Group | Recommendation |
|---|---|
| General Setting Policy | Ensure SSH warning banner is configured |
| General Setting Policy | Ensure Backup count is set to 5 or more |
| General Setting Policy | Ensure ‘Message Of The Day (MOTD)’ is set |
| General Setting Policy | Ensure Hostname is set |
| General Setting Policy | Ensure DNS server is configured |
| General Setting Policy | Ensure IPv6 is disabled if not used |
| General Setting Policy | Ensure ‘Disable DNS Rebinding Checks’ is unchecked |
| General Setting Policy | Ensure Web Management is Set to use HTTPS |
| User Management | Ensure Sessions Timeout is set to less than or equal to 10 Minutes |
| User Management | Ensure Console Menu is Password Protected |
| Password Policy | Ensure default password of admin is changed |
| Service Configuration | Ensure ‘DNSSEC’ is Enable on DNS Service |
Applying OPNsense CIS Benchmarks
The OPNsense installation completed successfully, and the interfaces have been configured. Now let’s access the web GUI and start applying the CIS recommendations.
Configure a client VM and set the network adapter connection to the LAN_01 LAN segment. I’ll be using Kali as my client. The client device should automatically receive an IP address from the 10.0.1.x range as defined earlier. Note: DHCP on OPT1 is not enabled by default. To enable it navigate to Services → Dnsmasq DNS & DHCP → General → Interface. Ensure LAN and OPT1 are selected.
In a web browser, navigate to https://10.0.1.1. Log in with the root account.
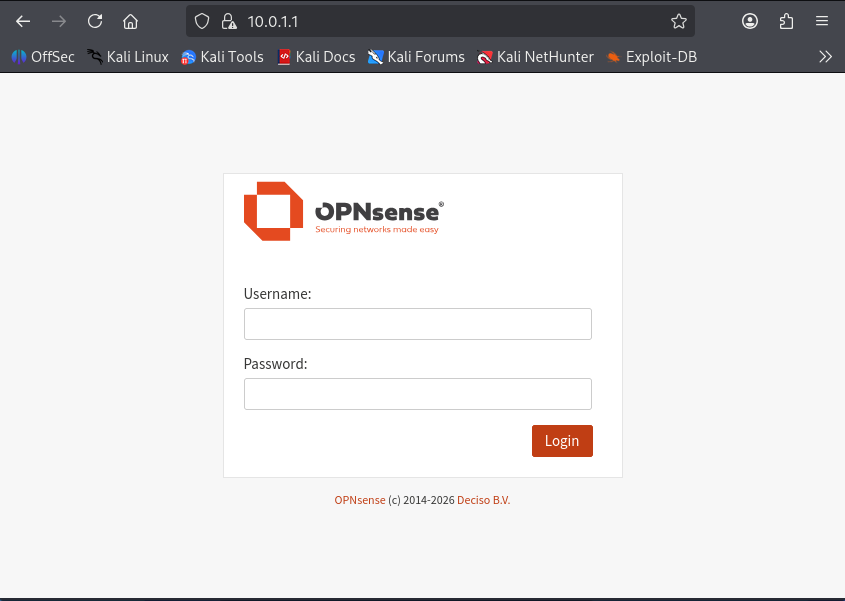
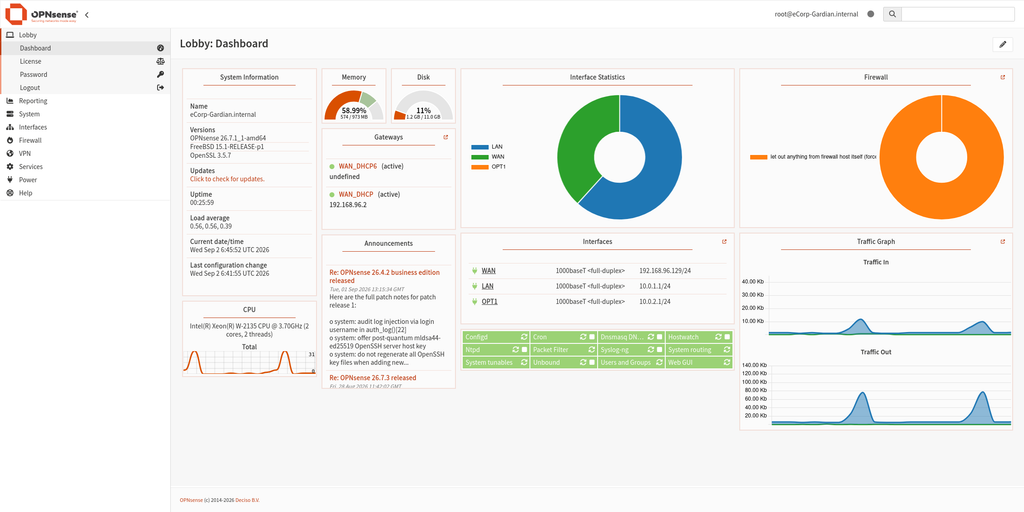
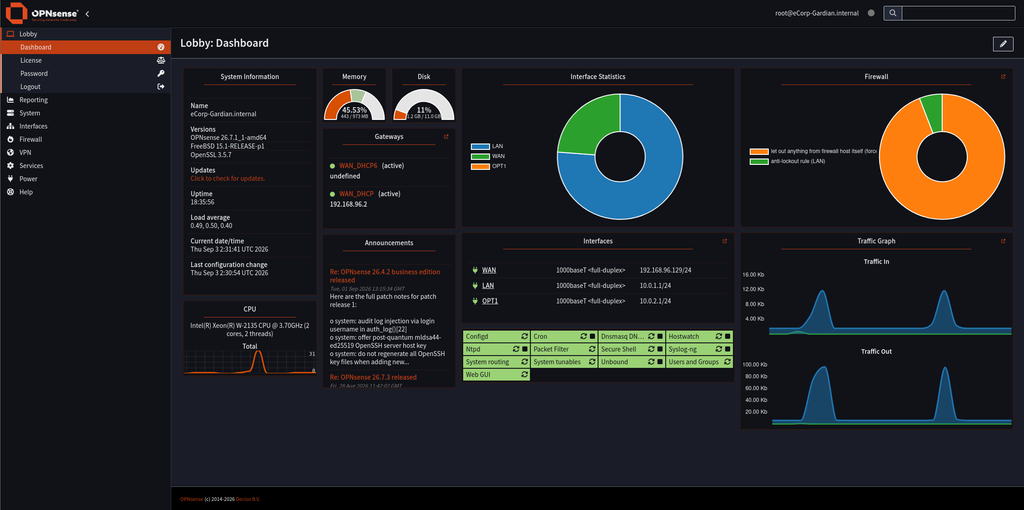
Navigate to Lobby → Dashboard to see current system information and statistics.
Recommendation 01: Ensure SSH warning banner is configured
The purpose of the banners is to notify users attempting to connect to the system of the connection rules or policies of the particular site and who is authorised to access said system. A warning message displayed before a typical user login could aid in prosecuting intruders.
By default, no SSH Banner is configured. To create a new banner:
- Log in to the OPNsense console and choose menu item 8) Shell.
- Create the banner file in /etn/ssh.
vi /etc/ssh/ecorp_banner - Type in the banner. Press
ito enter insert mode and pressEscto enter command mode when finished. Your file should look something like the image below. - Type
:wqthen Enter to write the changes to the file and quit the vi editor.
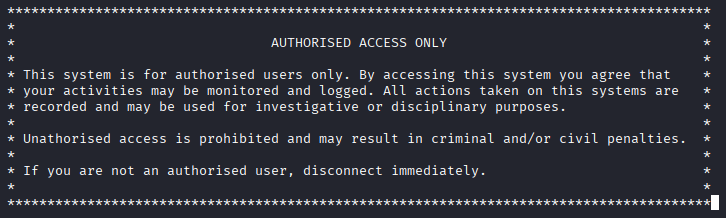
To ensure the banner is persistent, create a new configuration file vi /usr/local/etc/ssh/sshd_config.d/99-custom.conf and insert the line Banner /etc/ssh/ecorp_banner
Once the file is saved, return to the OPNsense GUI, navigate to Power → Reboot to restart the server and apply the new banner.
When logging in via SSH the user will be presented with the banner as seen below
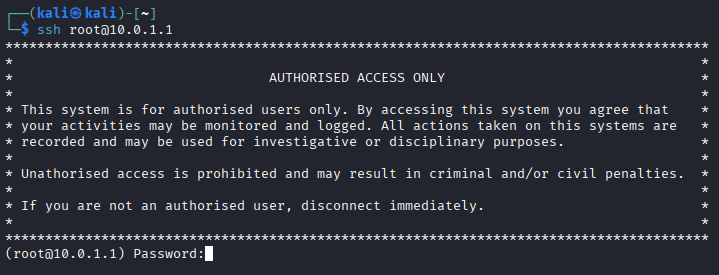
Recommendation 02: Ensure Backup count is set to 5 or more
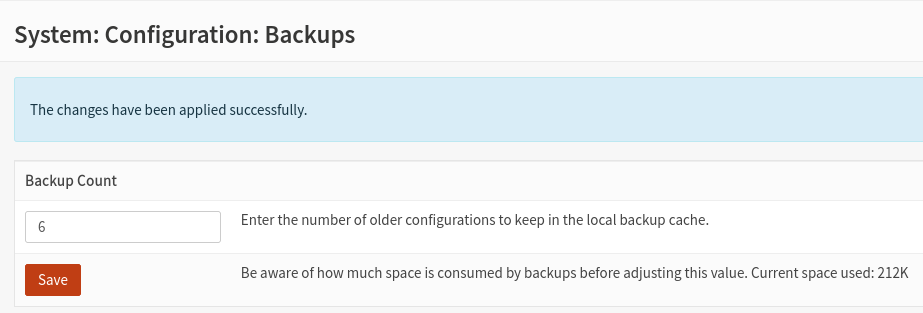
To enable restoring configuration changes before the most recent backup, specify at least 5 older configuration backups or restore points to roll back to. Navigate to Systems → Configuration → Backups → Backup Count. Enter the desired value then click Save.
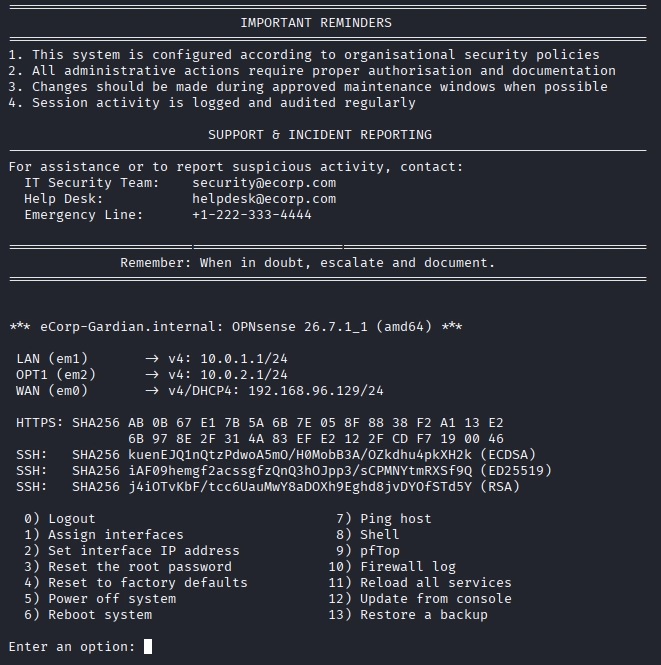
Recommendation 03: Ensure ‘Message Of The Day (MOTD)’ is set
Message of the Day banners are electronic messages used to provide legal notices to authorised users of a system after logon.
The default MOTD is a message from OPNsense identifying the version installed and URLs to OPNsense resources.
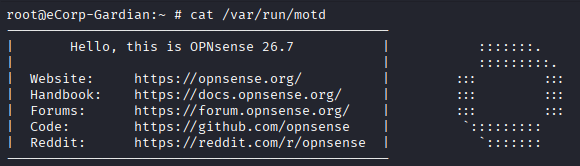
Create a new MOTD by editing the file.
- Open the file in the text editor
vi /var/run/motd. - Type the command
dGto clear the contents of the file. - Enter the new MOTD banner.
- Type
:wqandEnterto save and close the file.
You should now have the desired MOTD displayed on login
Recommendation 04 & 05: Ensure Hostname is set & Ensure DNS server is configured
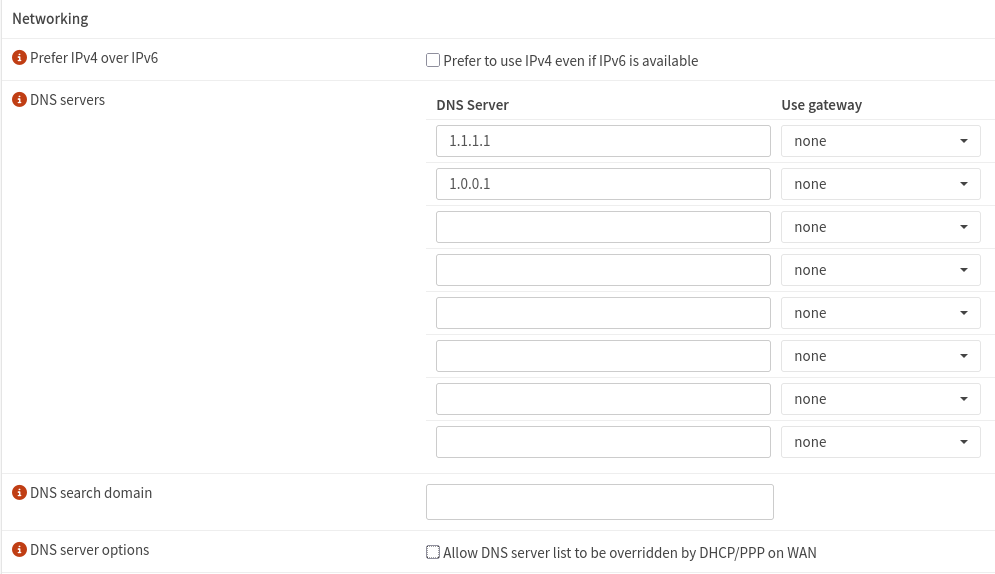
Setting a hostname ensures that the firewall can be properly identified during asset discovery and inventory, and aids correlation between security tools when investigating an incident.
Navigate to System → Settings → General → Hostname and enter the desired name.
I’ll move to the networking section and enter the Cloudflare DNS servers (1.1.1.1 and 1.0.0.1) for internet name resolution and uncheck Allow DNS server list to be overridden by DHCP/PPP on WAN to avoid using the ISP’s DNS servers. Click the Save button to apply the changes.
Recommendation 06: Ensure IPv6 is disabled if not used
If your environment is not utilising IPv6, it is recommended to disable it to reduce the attack surface.
Navigate to Interfaces → Settings. Check the box for Turn off IPv6 and click Save.
Recommendation 07: Ensure ‘Disable DNS Rebinding Checks’ is unchecked
DNS rebinding attacks exploit a DNS server by causing it to expose the private IP addresses of resources on the internal network that should not be accessible from the internet. This setting should be unchecked by default.
Navigate to System → Settings → Administration and confirm that Disable DNS Rebinding Checks is unchecked. Click Save to apply.
Recommendation 08: Ensure Web Management is set to use HTTPS
Any web management interface should be protected to ensure data, including user credentials, are not exposed to unauthorised parties. Utilising HSTS provides protection against downgrade attacks and cookie hijacking.
Navigate to System → Settings → Administration, check the box next to Enable HTTP Strict Transport Security and click Save to apply.
Recommendation 09: Ensure Sessions Timeout is set to less than or equal to 10 Minutes
The default Web UI browser session is set to 4 hours. This means a logged-in user can be idle for 4 hours before the session is forcefully terminated. This can be very risky, as it gives an attacker an exceptionally long time to abuse the abandoned session.
Navigate to System → Settings → Administration. In the Session Timeout field, change the default 240 minutes to 10 minutes. Click Save to apply the change.
Recommendation 10: Ensure Console Menu is Password Protected
An unattended computer with an open Console Menu session to the device could allow an unauthorised user access to the firewall’s management. This setting is enabled by default.
Navigate to System → Settings → Administration. Scroll to the Console section and confirm that Password protect the console menu is checked. Click Save to apply.
Recommendation 11: Ensure default password of admin is changed
Failing to change the default ‘root’ account’s password creates a high risk to the system, as the ‘root’ account may be abused by unauthorised users, allowing them full root access to the system.
This was already done during the initial installation.
Recommendation 12: Ensure ‘DNSSEC’ is Enable on DNS Service
DNSSEC is a means of protecting DNS data from attacks which use forged or manipulated DNS data, such as DNS cache poisoning.
Navigate to Services → Unbound DNS → General and check the option Enable DNSSEC Support. Click Save to apply.
Bonus Recommendation: Dark mode
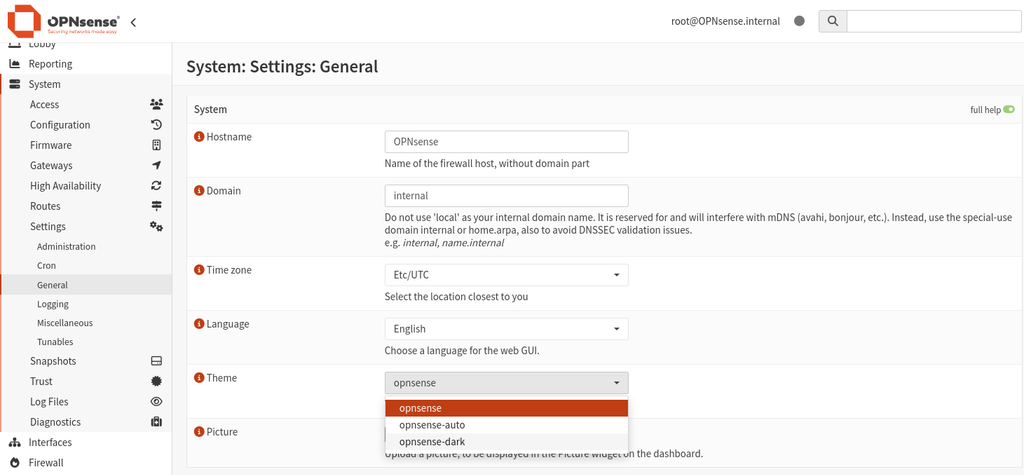
This is not a CIS recommendation, but a quality of life recommendation. Save your eyes and enable dark mode.
Navigate to System → Settings → General → Theme → opnsense-dark. Choose Save.
Wrap Up
OPNsense is installed and basic hardening controls have been applied as per the CIS Benchmark recommendations. A hardened firewall is only as strong as its last review. As your environment’s maturity evolves, revisit the baseline recommendations especially with a new release of OPNsense and apply additional hardening.
Let’s perform two final steps:
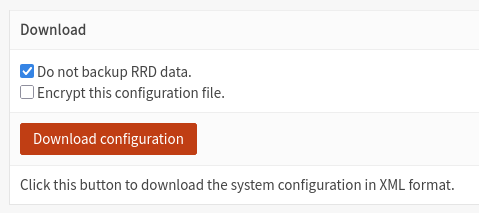
- Download the current system configuration Navigate to System → Configuration → Backups. Process to the Download section and click the Download configuration button. Save the downloaded file in a secure location.
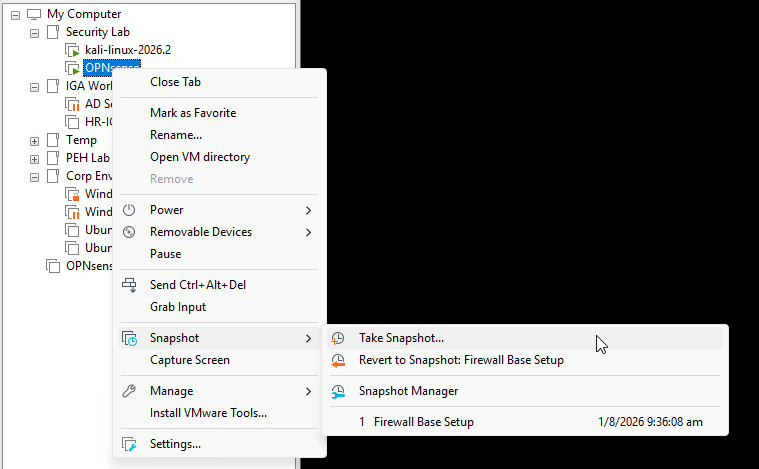
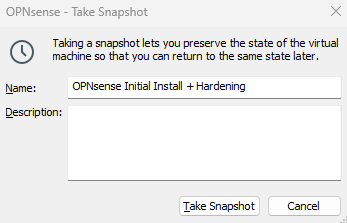
- Create a snapshot of the VM that will allow us to roll back to a clean and hardened state Right click the OPNsense VM in the Library pane of VMware Workstation. Choose Snapshot → Take Snapshot. Enter a descriptive name for the snapshot and click the Take Snapshot button.
If you gained value from this journal, share it with your colleagues and share in the comments your results, tweaks, or gotchas in the comments so the next reader gets an even smoother install.