October 09, 2021
How to secure important information using the cloud
Install Windows 11 on Unsupported Computers
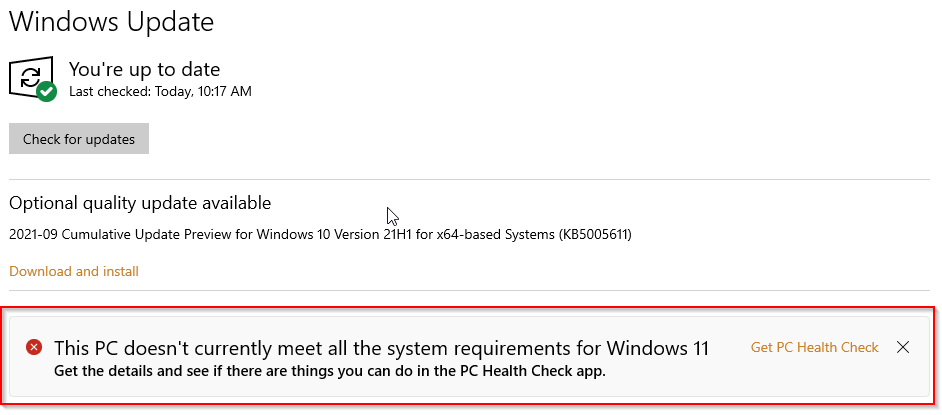
On October 5, 2021, Microsoft started the phased rollout of its latest version of the Windows desktop operating system, Windows 11 (build 21H2). Users who are running Windows 10 build 2004 and higher should start seeing the option to perform a free upgrade to Windows 11, providing your computer’s hardware meet the minimum system requirements. Machines with unsupported hardware will see the notice as seen below:
With this new polished OS, Microsoft has set minimum system requirements which include:
- 1GHz dual-core 64-bit processor
- 4GB RAM
- Unified Extensible Firmware Interface (UEFI) with Secure Boot capable
- Trusted Platform Module (TPM) version 2.0
- DirectX 12 compatible graphics card with WDDM 2.0 driver
- 720p Display
These system requirements have left many older computers wanting and being placed in the category of Windows 11 unsupported computers. The 3 most critical requirements are the type of processor installed in the computer, having UEFI with Secure boot and TPM 2.0.
How I Installed Windows 11 on an Unsupported Computer
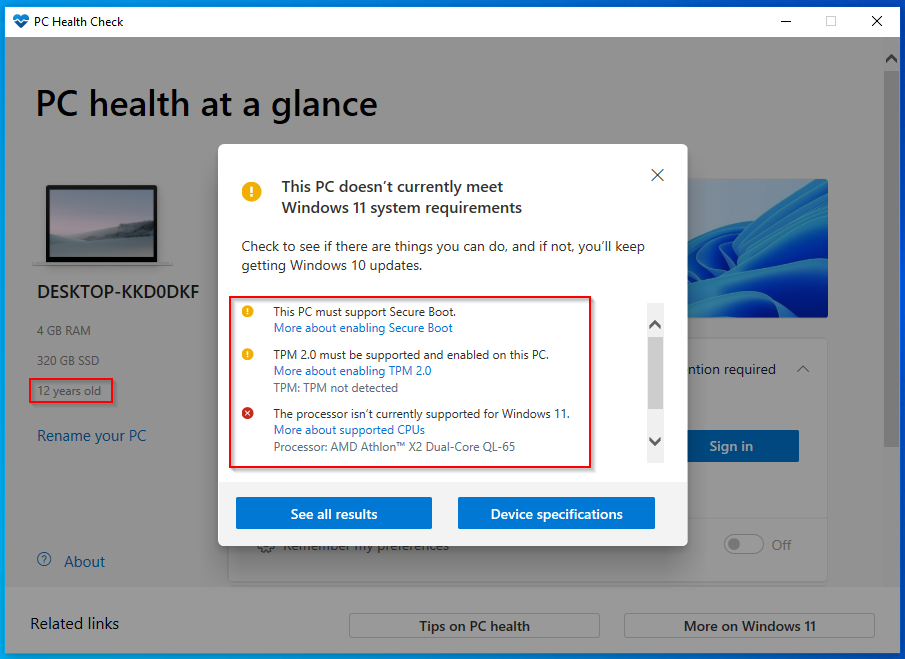
I have a 12-year-old computer at home and while it runs Windows 10 Home quite fine, it now displays the notice that it does not meet the system requirements to install Windows 11. I downloaded and installed the PC Health Check app to see what were the requirements this computer was falling short on. As it turns out it was lacking most of the critical things. It had no UEFI, no TPM and an unsupported processor.
I however wanted to see if there was a way to get Windows 11 installed and what the performance would be like if possible. After some research, I found an approach that another curious user attempted, but I would make adjusts to simplify the approach making it easier to execute.
Here are the steps I took:
- Download the Windows 10 ISO file
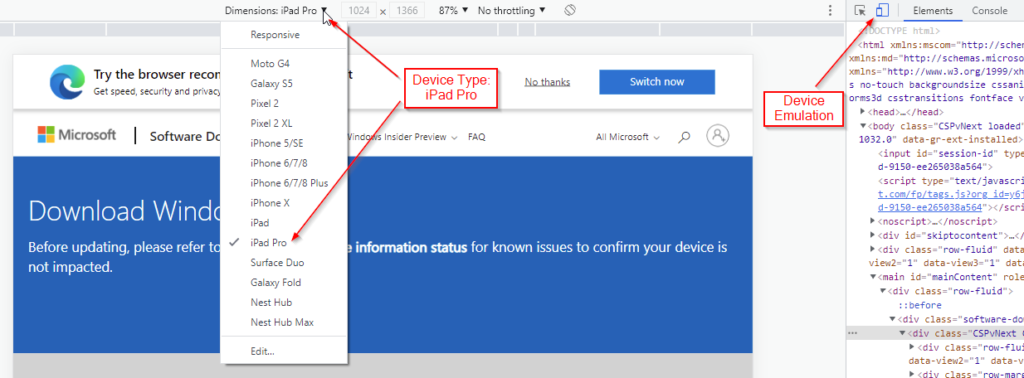
- Visit the Windows 10 download page. You will be presented with a link to download the Windows 10 Media Creation Tool that would download the required files to save as an ISO file on your computer or create a bootable DVD or Flash Drive. Here we will fast track the download of the ISO file by downloading the file directly.
- Right-click on the page and choose Inspect from the menu options
- Turn on device emulation, then choose the iPad Pro as the device to emulate, after which refresh the page
- The page will reload now with the option to download the ISO file we need. Follow through by choosing Windows 10, the language (English in my case) and finally choosing the “64-bit Download”
- Download Window 11 ISO file
- This is much simpler. Visit the Windows 11 download page and go to the section “Download Windows 11 Disk Image (ISO)”
- Follow through by choosing Windows 11, the language (English in my case) and finally choosing the “64-bit Download”
- Download and install Rufus. I chose to use Rufus for this task because the Windows Media Creation tool creates a bootable flash drive using the FAT32 filesystem which limits individual file sizes to 4GB. This would become a hindrance later on.
- Insert a minimum of an 8GB flash drive and then run Rufus. Choose the Select button and browse to the location where your Windows 10 ISO was saved. Be sure to mirror the settings I have selected in the screenshot below. As this computer does not have UEFI I chose MBR for the Partition scheme. If you confirm your device has UEFI then go ahead and chose GPT. Also, ensure the File system option is set to NTFS to overcome the 4GB limit for files when we copy a file later. Click on Start to have Rufus create your bootable Windows flash drive. Do ensure you have nothing of value on the flash drive as everything will be erased in the process.

- Once the bootable drive has been created, browse to the location where you saved the Windows 11 ISO, double click it to mount it.
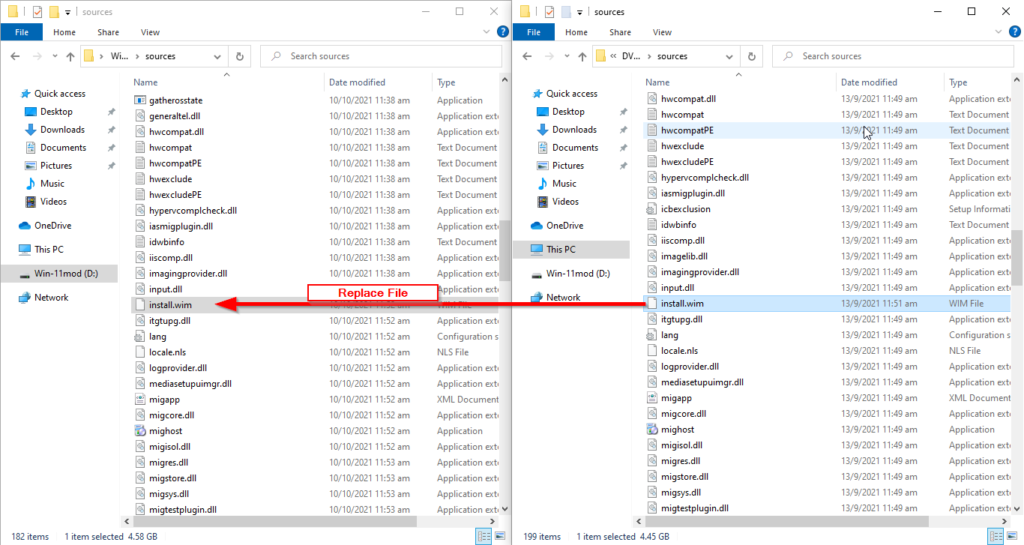
- Navigate to the sources folder and look for a file named install.wim. This file stores the installation for Windows 11 (4.45GB). Copy the file and then navigate to the same folder location on the Flash drive and delete install.wim and then paste the new file. In essence, what we are doing here is creating a Windows 11 installation disk using the Windows 10 installer that will not be checking for the new system requirements 😀
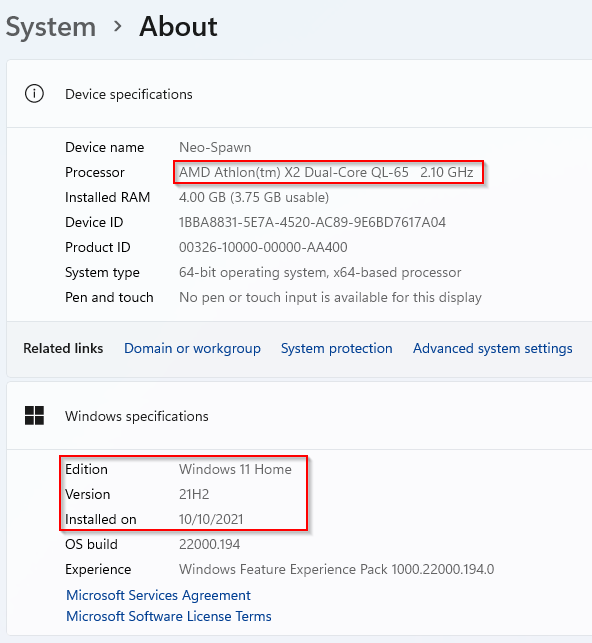
- Restart your computer, having backed up your data to external storage. Proceed with installing Windows as normal, choosing the correct version of Windows to install. As this machine had a digital license for Windows 10 Home, I chose Windows 11 Home.
Finishing Windows 11 Setup
On the first reboot, you will be brought through the setup process. You MUST connect to a wired or wireless network with internet connectivity to be able to proceed with setup if you have installed Windows 11 Home. They do make mention of this on the system requirements page we visited earlier “Windows 11 Home edition requires internet connectivity and a Microsoft account.” I was able to bypass the Microsoft account requirement by disconnecting the device from the internet when it restarted after downloading and installing initial Windows 11 updates. I created a local Windows user account and completed the setup process.
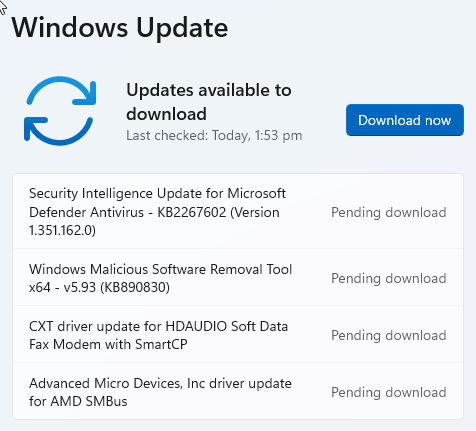
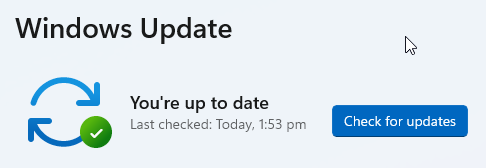
As the popular saying goes, the proof is in the pudding. Below are screenshots showing the completed install and confirmation of the download and installation of all remaining Windows 11 updates. I will continue to test the performance of the machine in the coming week. I am unsure if Microsoft will push out additional updates, later on, to prevent unsupported computers from downloading and installing updates or just rendering unsupported machines inoperable. Only time will tell. Let me know if you tried this approach of installing Windows 11 on an unsupported computer and share your results.